关于新架构
自2018年以来,React Native团队一直在重新设计React Native的核心内部结构,以使开发人员能够创建更高质量的体验。截至2024年,此版本的React Native已在大规模应用中得到验证,并为Meta的生产应用程序提供支持。
术语新架构指的是新的框架架构以及将其引入开源社区的工作。
新架构已于 React Native 0.68 版本中开放实验性选择加入,并在后续的每个版本中持续改进。团队目前正致力于使其成为React Native开源生态系统的默认体验。
为何采用新架构?
经过多年使用React Native的开发经验,团队发现了一系列限制,这些限制阻碍了开发人员创建高度精致的体验。这些限制是框架现有设计的根本所在,因此新架构最初是对React Native未来的一项投资。
新架构解锁了在旧架构中不可能实现的功能和改进。
同步布局和效果
构建自适应UI体验通常需要测量视图的大小和位置并调整布局。
如今,您会使用 onLayout 事件来获取视图的布局信息并进行任何调整。然而,onLayout 回调中的状态更新可能会在绘制前一个渲染之后才应用。这意味着用户可能会看到初始布局渲染和响应布局测量之间的中间状态或视觉跳动。
通过新架构,我们可以通过同步访问布局信息和适当调度更新来完全避免这个问题,从而确保用户看不到任何中间状态。
示例:渲染工具提示
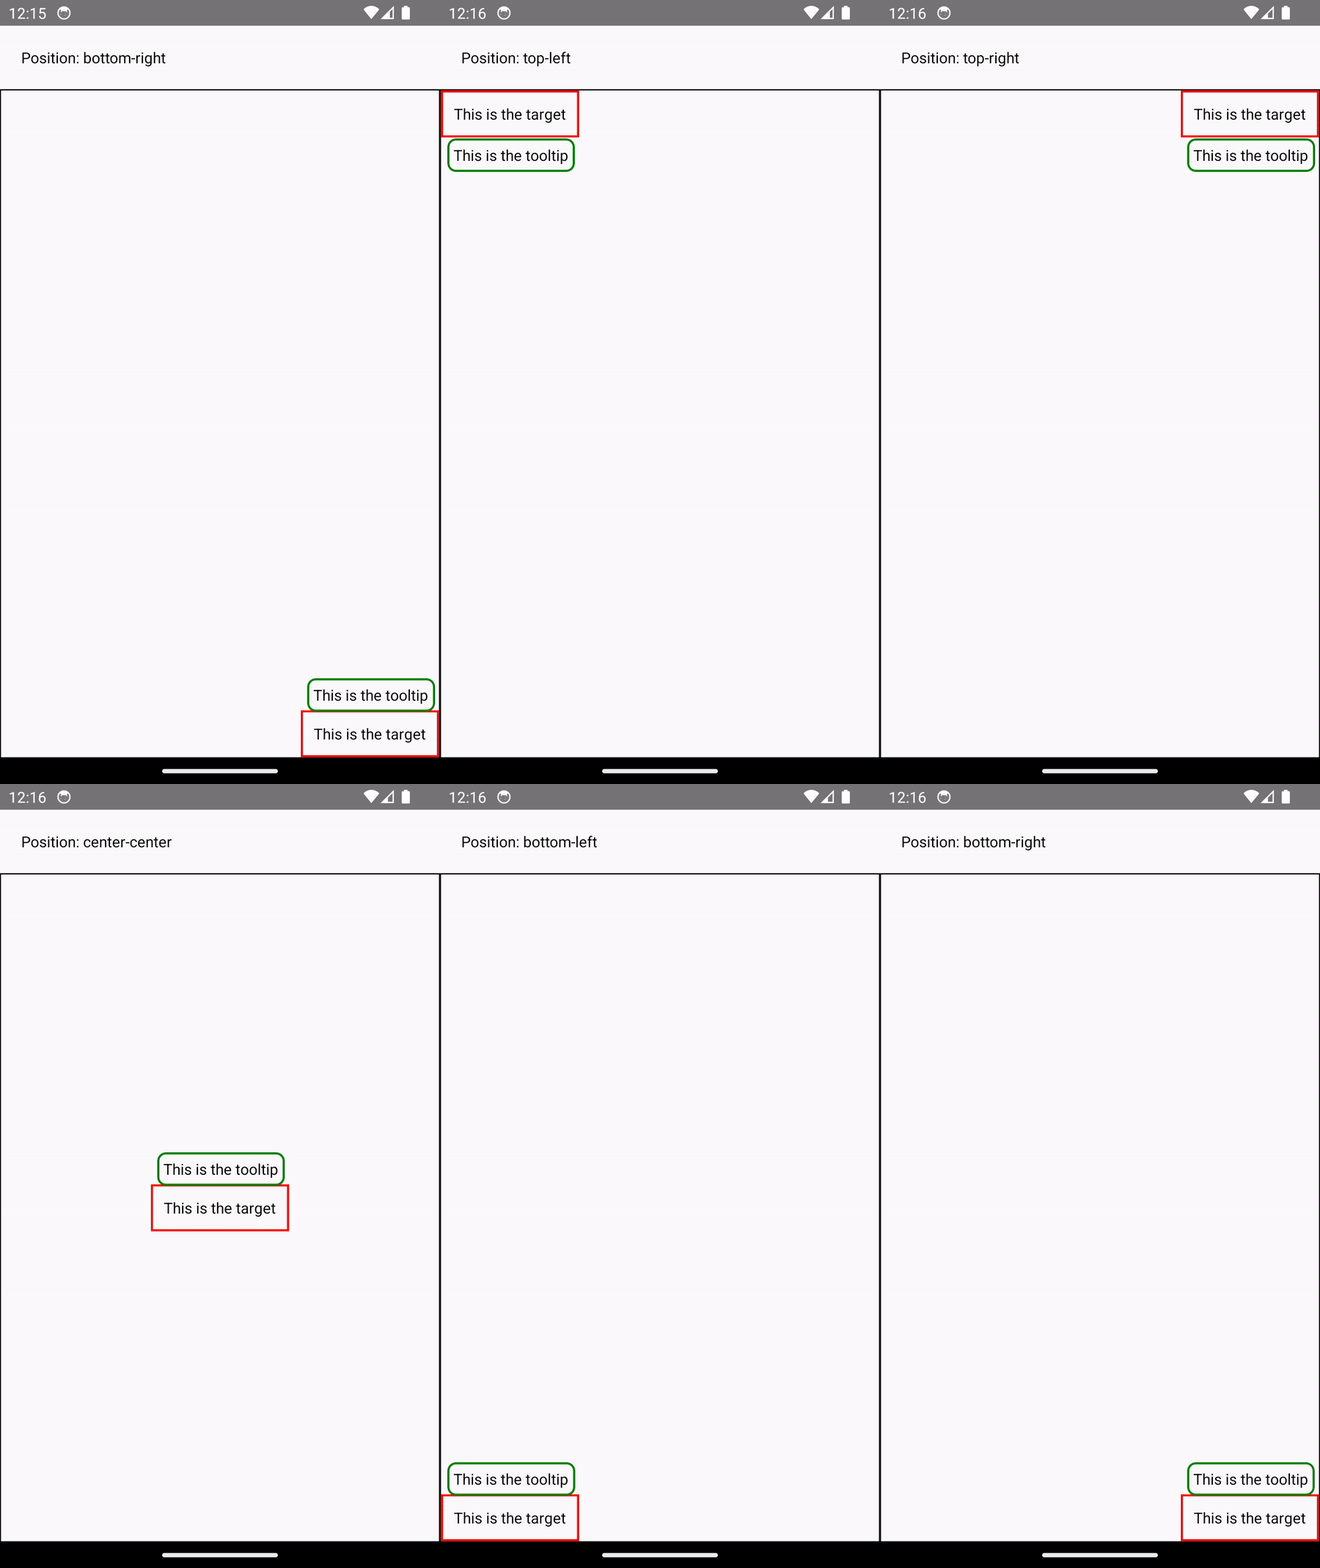
测量并将工具提示放置在视图上方可以展示同步渲染所带来的功能。工具提示需要知道其目标视图的位置以确定其应渲染的位置。
在当前架构中,我们使用 onLayout 来获取视图的测量值,然后根据视图的位置更新工具提示的定位。
function ViewWithTooltip() {
  // ...

  // We get the layout information and pass to ToolTip to position itself
  const onLayout = React.useCallback(event => {
    targetRef.current?.measureInWindow((x, y, width, height) => {
      // This state update is not guaranteed to run in the same commit
      // This results in a visual "jump" as the ToolTip repositions itself
      setTargetRect({x, y, width, height});
    });
  }, []);

  return (
    <>
      <View ref={targetRef} onLayout={onLayout}>
        <Text>Some content that renders a tooltip above</Text>
      </View>
      <Tooltip targetRect={targetRect} />
    </>
  );
}
通过新架构,我们可以使用 useLayoutEffect 在一次提交中同步测量和应用布局更新,从而避免视觉上的“跳动”。
function ViewWithTooltip() {
  // ...

  useLayoutEffect(() => {
    // The measurement and state update for `targetRect` happens in a single commit
    // allowing ToolTip to position itself without intermediate paints
    targetRef.current?.measureInWindow((x, y, width, height) => {
      setTargetRect({x, y, width, height});
    });
  }, [setTargetRect]);

  return (
    <>
      <View ref={targetRef}>
        <Text>Some content that renders a tooltip above</Text>
      </View>
      <Tooltip targetRect={targetRect} />
    </>
  );
}
支持并发渲染器和功能
新架构支持在 React 18 及更高版本中发布的并发渲染和功能。您现在可以在React Native代码中使用Suspense进行数据获取、Transitions以及其他新的React API等功能,进一步统一Web和原生React开发之间的代码库和概念。
并发渲染器还带来了开箱即用的改进,例如自动批处理,这减少了React中的重新渲染。
示例:自动批处理
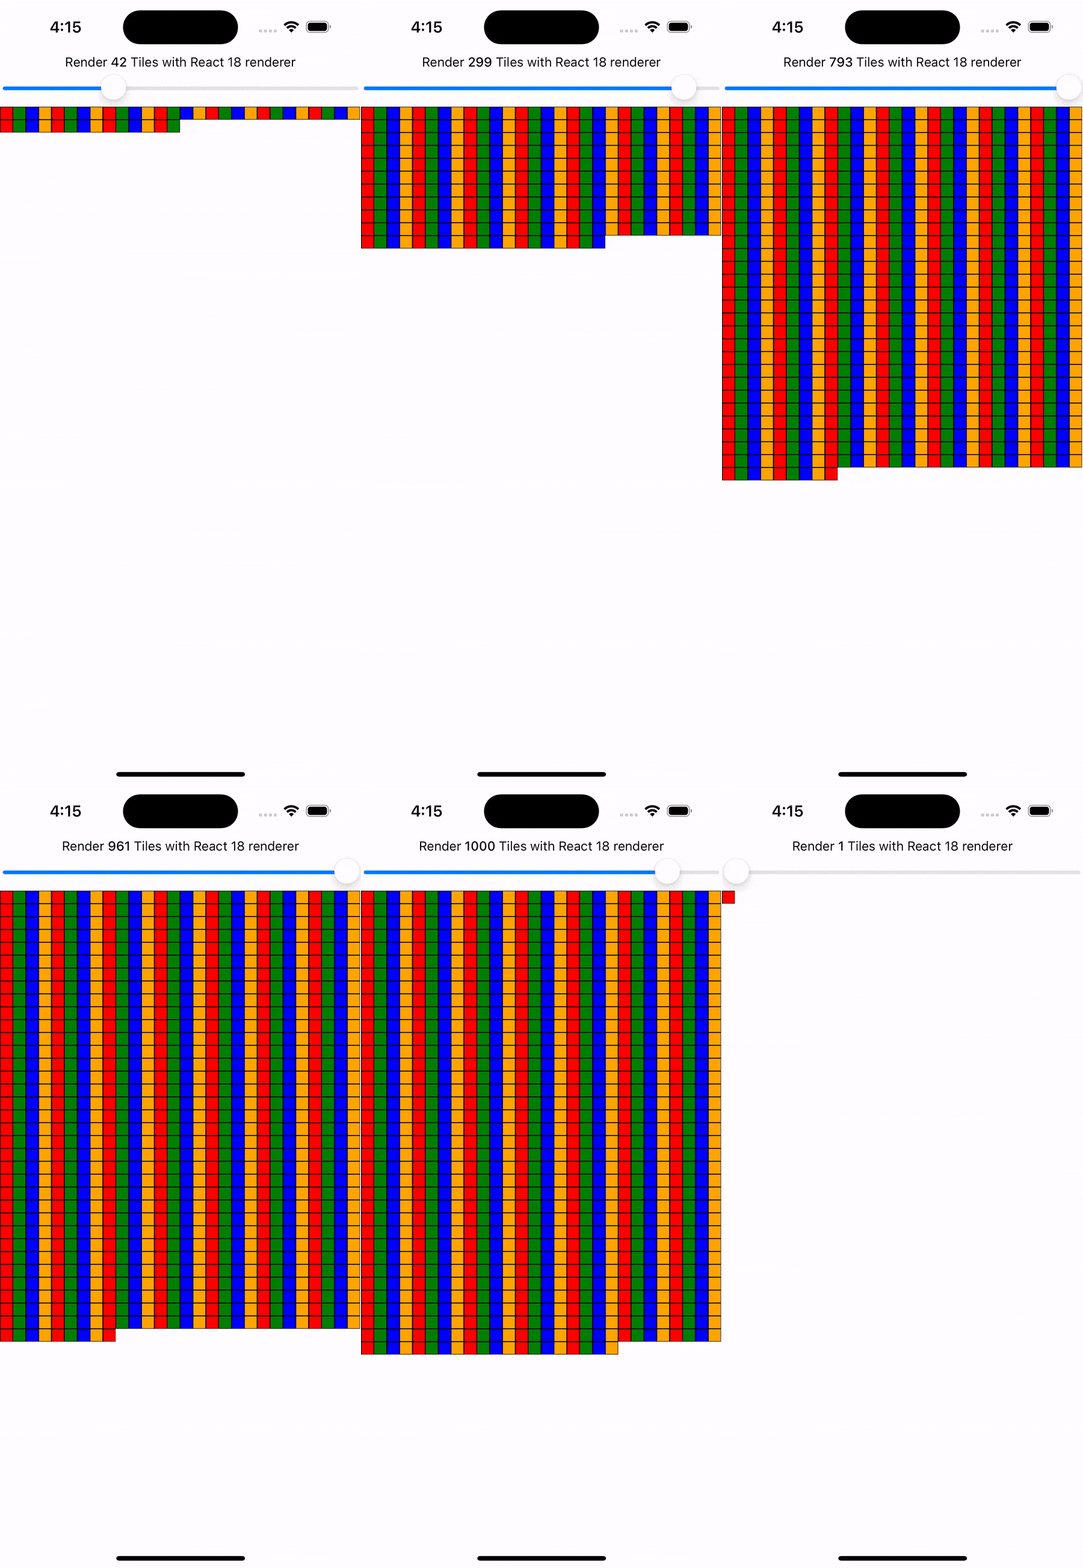
通过新架构,您将通过React 18渲染器获得自动批处理。
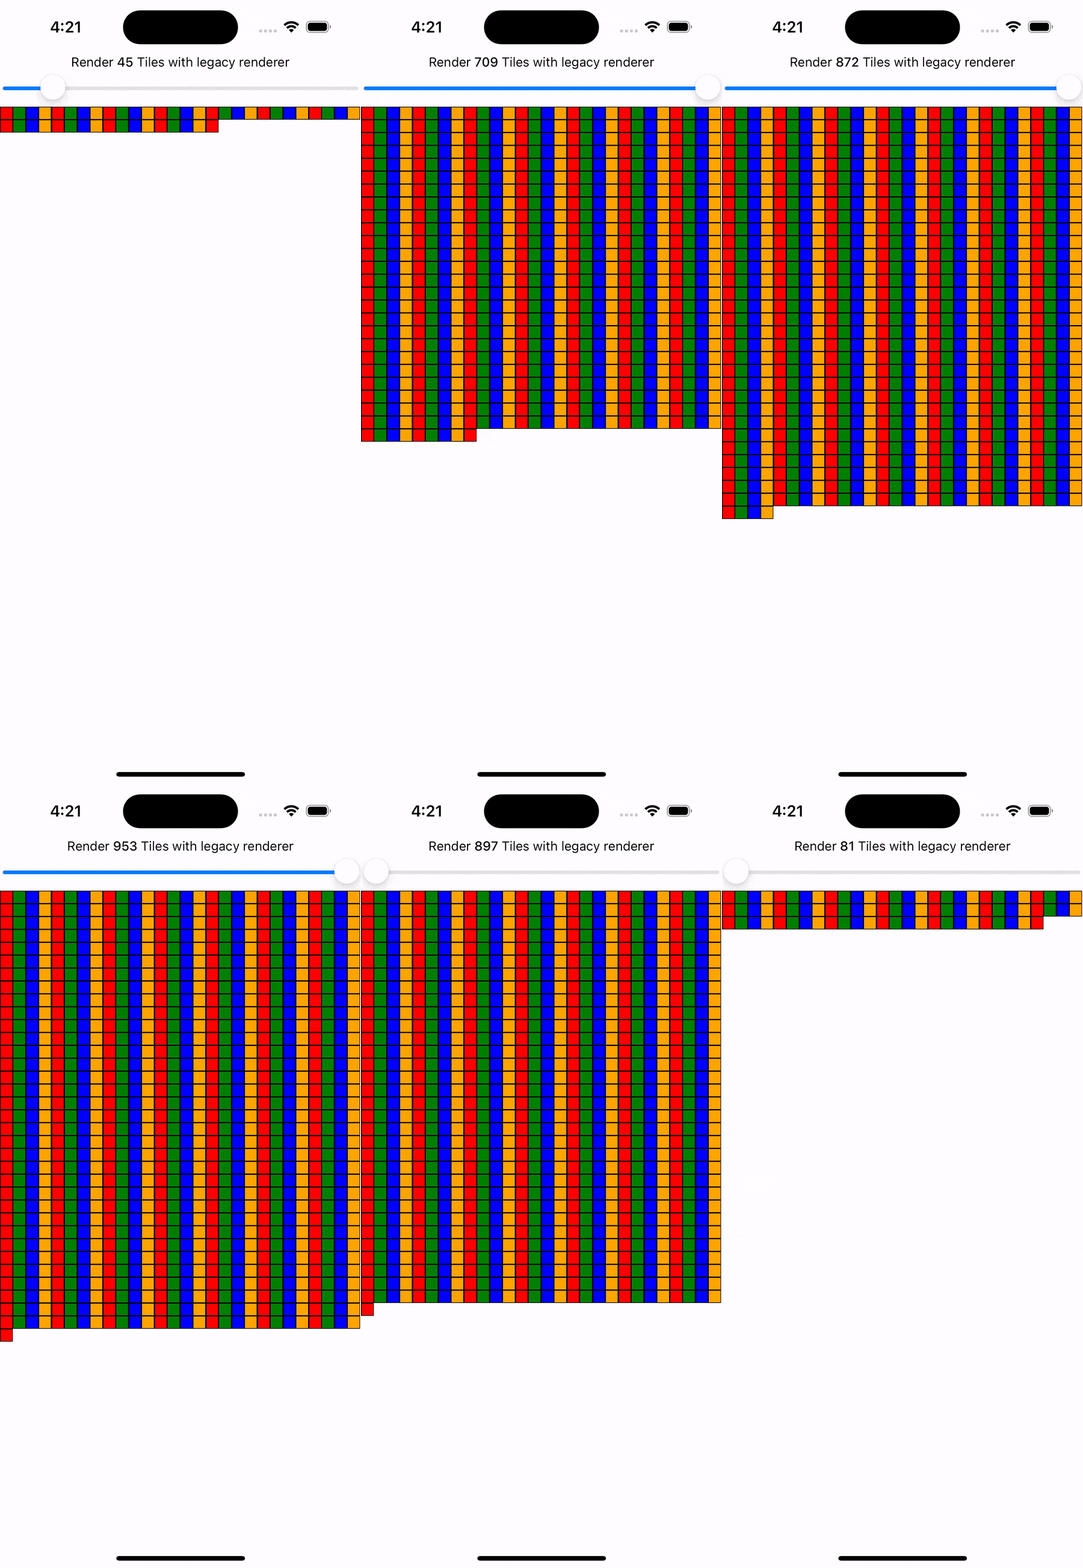
在此示例中,一个滑块指定要渲染的瓷砖数量。将滑块从0拖动到1000将触发一系列快速的状态更新和重新渲染。
在比较 相同代码 的渲染器时,您可以直观地注意到渲染器提供了更流畅的UI,更少的中间UI更新。来自原生事件处理程序(例如此原生滑块组件)的状态更新现在已批处理。


新的并发功能,如 Transitions,让您能够表达UI更新的优先级。将更新标记为较低优先级会告诉React它可以“中断”渲染该更新,以处理较高优先级的更新,从而在重要的地方确保响应迅速的用户体验。
示例:使用 startTransition
我们可以在上一个示例的基础上,展示过渡如何中断正在进行的渲染以处理新的状态更新。
我们将瓦片数量状态更新包装在 startTransition 中,以指示瓦片的渲染可以被中断。 startTransition 还提供了一个 isPending 标志来告诉我们过渡何时完成。
function TileSlider({value, onValueChange}) {
  const [isPending, startTransition] = useTransition();

  return (
    <>
      <View>
        <Text>
          Render {value} Tiles
        </Text>
        <ActivityIndicator animating={isPending} />
      </View>
      <Slider
        value={1}
        minimumValue={1}
        maximumValue={1000}
        step={1}
        onValueChange={newValue => {
          startTransition(() => {
            onValueChange(newValue);
          });
        }}
      />
    </>
  );
}

function ManyTiles() {
  const [value, setValue] = useState(1);
  const tiles = generateTileViews(value);
  return (
      <TileSlider onValueChange={setValue} value={value} />
      <View>
        {tiles}
      </View>
  )
}
您会注意到,在过渡中频繁更新时,React 渲染的中间状态更少,因为它在状态变得陈旧时立即放弃渲染。相比之下,如果没有过渡,则会渲染更多的中间状态。这两个示例仍然使用自动批处理。然而,过渡赋予开发人员更大的权力来批处理正在进行的渲染。
快速的JavaScript/原生接口
新架构取消了JavaScript和原生之间的 异步桥接,并将其替换为JavaScript接口(JSI)。JSI是一个接口,允许JavaScript持有C++对象的引用,反之亦然。通过内存引用,您可以直接调用方法而无需序列化成本。
JSI 使 VisionCamera(一个流行的 React Native 相机库)能够实时处理帧。典型的帧缓冲区大小约为 30 MB,根据帧率,这相当于每秒约 2 GB 的数据。与桥接的序列化成本相比,JSI 可以轻松处理如此大量的数据交互。JSI 还可以暴露其他复杂的基于实例的类型,例如数据库、图像、音频样本等。
新架构中 JSI 的采用消除了所有原生-JavaScript 互操作中的此类序列化工作。这包括初始化和重新渲染 View 和 Text 等原生核心组件。您可以在我们对新架构中 渲染性能的调查 以及我们测量到的改进基准中了解更多信息。
启用新架构后,我能期待什么?
虽然新架构支持这些功能和改进,但为您的应用程序或库启用新架构可能不会立即提高性能或用户体验。
例如,您的代码可能需要重构才能利用同步布局效果或并发功能等新功能。尽管JSI将最大限度地减少JavaScript和原生内存之间的开销,但数据序列化可能并非您应用程序性能的瓶颈。
在您的应用或库中启用新架构即是拥抱 React Native 的未来。
团队正在积极研究和开发新架构所解锁的新功能。例如,Web 对齐是 Meta 正在积极探索的领域,并将交付到 React Native 开源生态系统。
您可以在我们专门的 讨论与提案 存储库中关注并贡献。
我今天应该使用新架构吗?
在 0.76 版本中,新架构在所有 React Native 项目中默认启用。
如果您发现任何运行不正常的地方,请使用 此模板 提交问题。
如果由于任何原因您无法使用新架构,您仍然可以将其禁用
Android
- 打开
android/gradle.properties文件 - 将
newArchEnabled标志从true切换到false
# Use this property to enable support to the new architecture.
# This will allow you to use TurboModules and the Fabric render in
# your application. You should enable this flag either if you want
# to write custom TurboModules/Fabric components OR use libraries that
# are providing them.
-newArchEnabled=true
+newArchEnabled=false
iOS
- 打开
ios/Podfile文件 - 在 Podfile 的主作用域中添加
ENV['RCT_NEW_ARCH_ENABLED'] = '0'(模板中的 Podfile 参考)
+ ENV['RCT_NEW_ARCH_ENABLED'] = '0'
# Resolve react_native_pods.rb with node to allow for hoisting
require Pod::Executable.execute_command('node', ['-p',
  'require.resolve(
- 使用以下命令安装您的 CocoaPods 依赖项
bundle exec pod install


